OrthoScribe Services & Onboarding Master Guide
Comprehensive reference for Providers, MAs, and Admins.
This guide consolidates setup, daily workflows, team collaboration, exports, tips, and troubleshooting for both integrated and non‑integrated users.
1. Product Overview
1.1 Components
- iPhone app (primary client) — Main interface for recording and managing encounters
- Desktop app (Wireless Mic) — Real-time Speech-to-Text with macro support; outputs anywhere your desktop cursor is focused
- Web portal — app.orthoscribe.ai for reviewing notes, copying to EMR, editing macros/procedures, viewing logs
- Apple Watch companion — Quick, low-distraction start/stop for visits
1.2 Two Ways to Create Documentation
Wireless Mic (Speech-to-Text)
Dictate anything (notes from scratch, letters, email, EMR fields) and use voice macros. Designed for speed and medical accuracy. Works independently of EHR integrations.
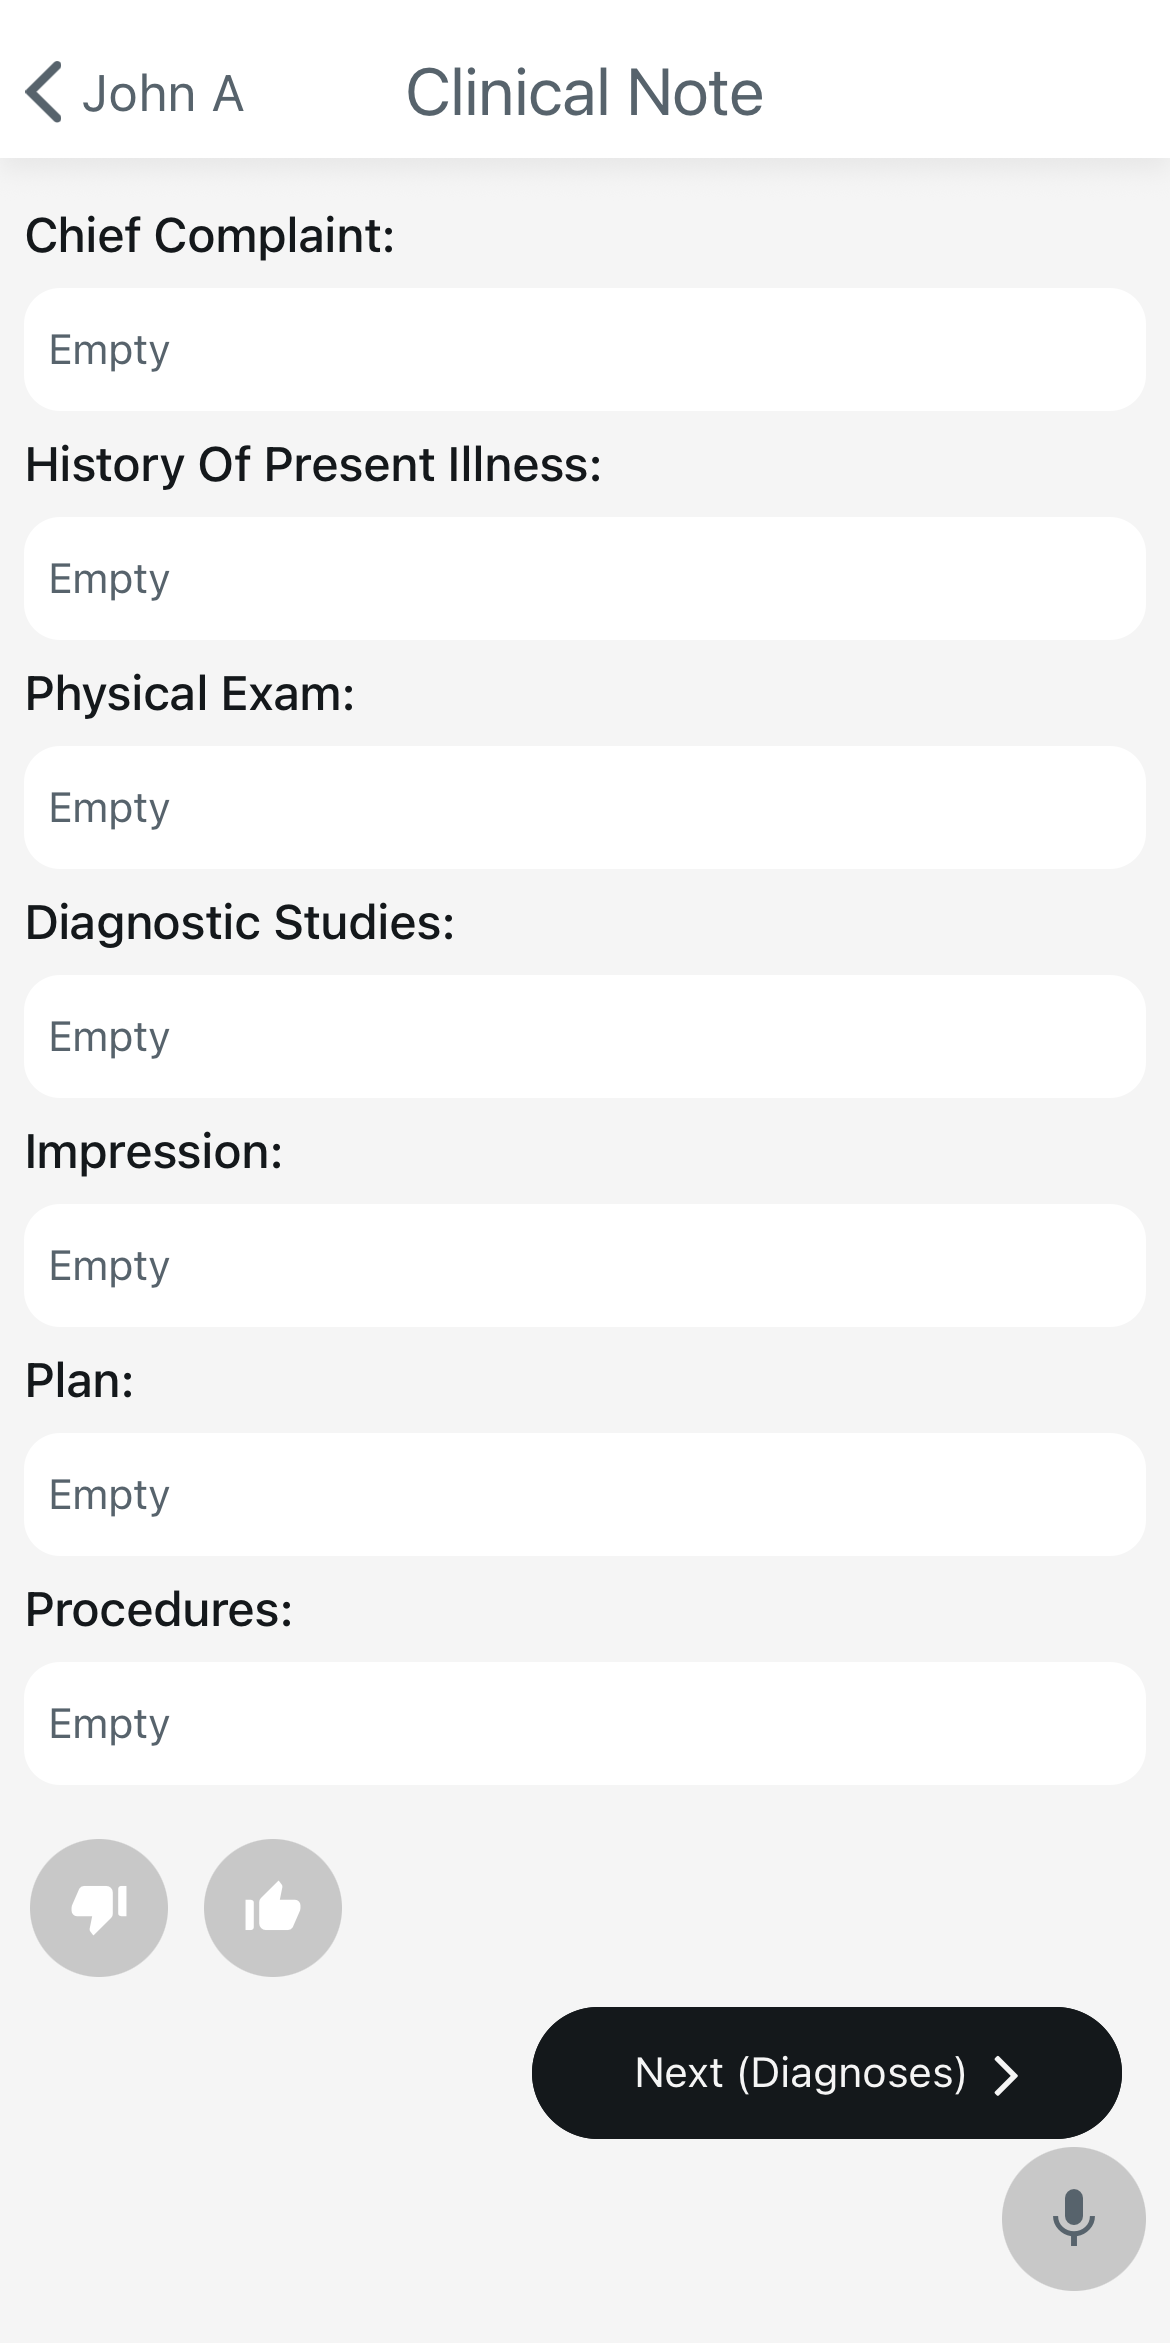
AI Note Service (Structured Notes)
Generates sectioned notes:
- • Chief Complaint
- • History of Present Illness
- • Physical Exam
- • Diagnostic Studies
- • Impression/Assessment
- • Plan
- • Procedures
Works with ambient capture or direct dictation.
1.3 User Types
Integrated
Linked to the EHR (e.g., athena). Schedule imports automatically; notes and codes upload automatically; provider reviews/submits in the EHR.
Non-Integrated (Standalone)
Schedule is created in OrthoScribe (Camera or Voice). Notes are copied from the web portal into your EHR (or dictated with Wireless Mic). Schedule sharing with MAs/PAs is common, and MAs often use the web app for copy/paste.
2. Install & First-Day Checklist
Complete Setup Checklist
- Install iOS app from the App Store; sign in with your Apple ID
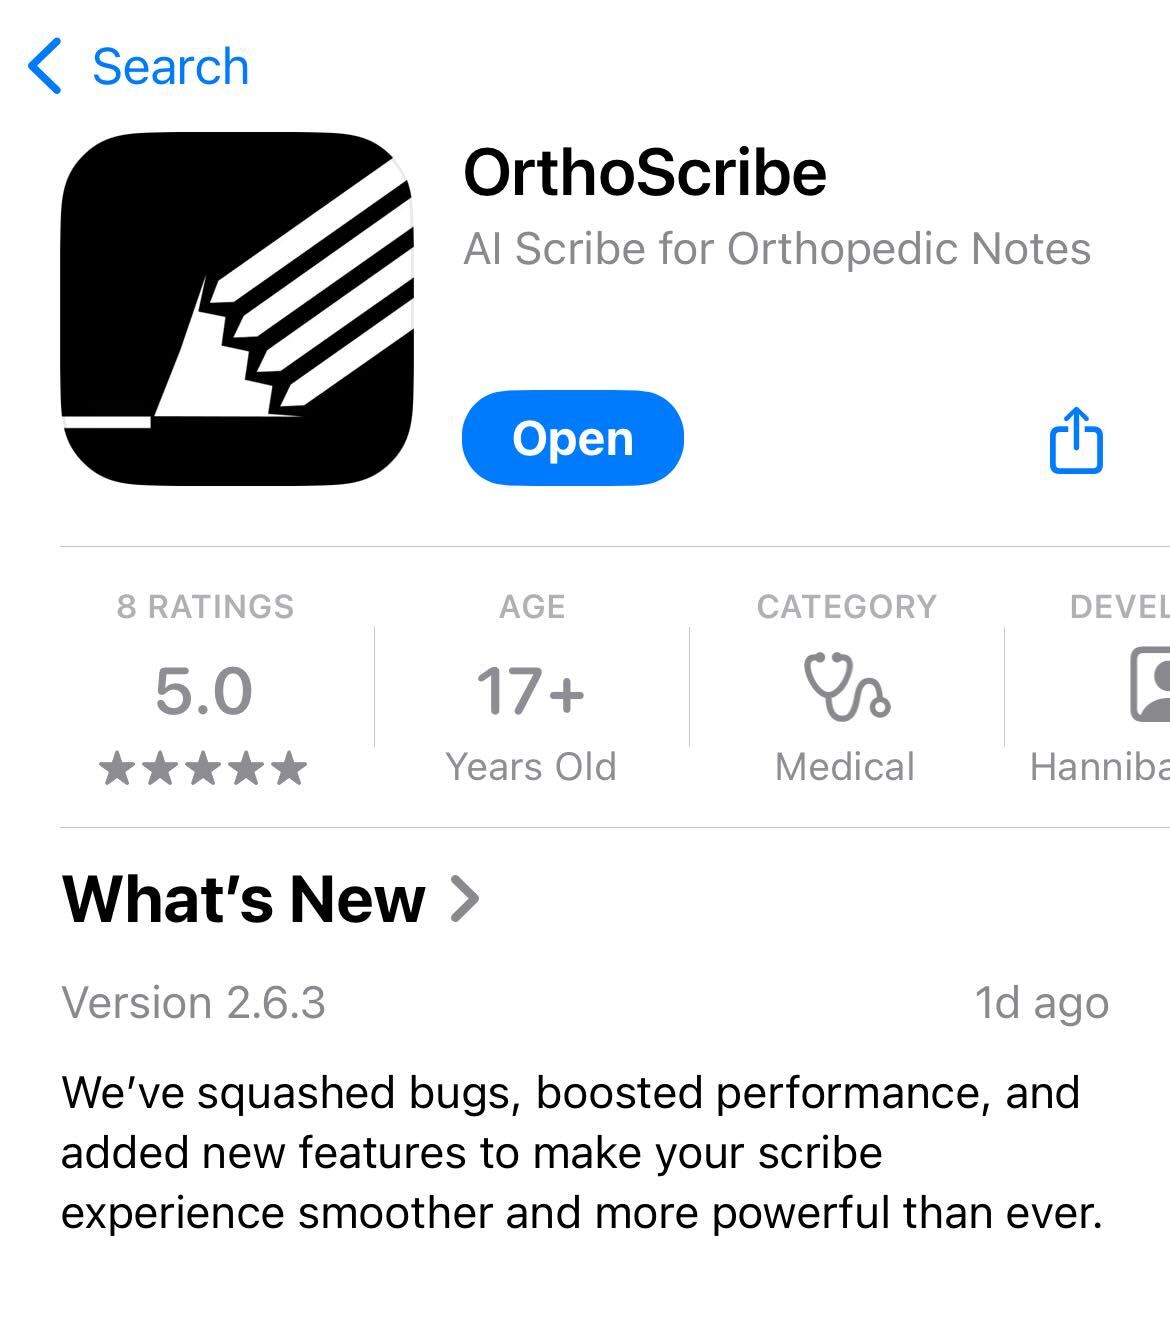 OrthoScribe App Store listing
 - Optional: Install Desktop app (Wireless Mic) for dictation anywhere
- Pick your workflow (Integrated vs Non-Integrated) and complete the matching setup
- Configure key settings:
- • Speech to Text → Word Swap (custom vocab)
- • EMR Settings → Uploads (export controls)
- • EMR Settings → Disclaimer (footer text)
- • Automatic Coding (CPT & ICD) (enable as desired)
- Create starter macros in the web portal → Macros
- Link your team (MA/PA/NP) via Schedule Sharing (supports QR linking)
 Schedule sharing page
3. Integrated Workflow (EHR-Linked)
For users with an integration code provided by your admin.
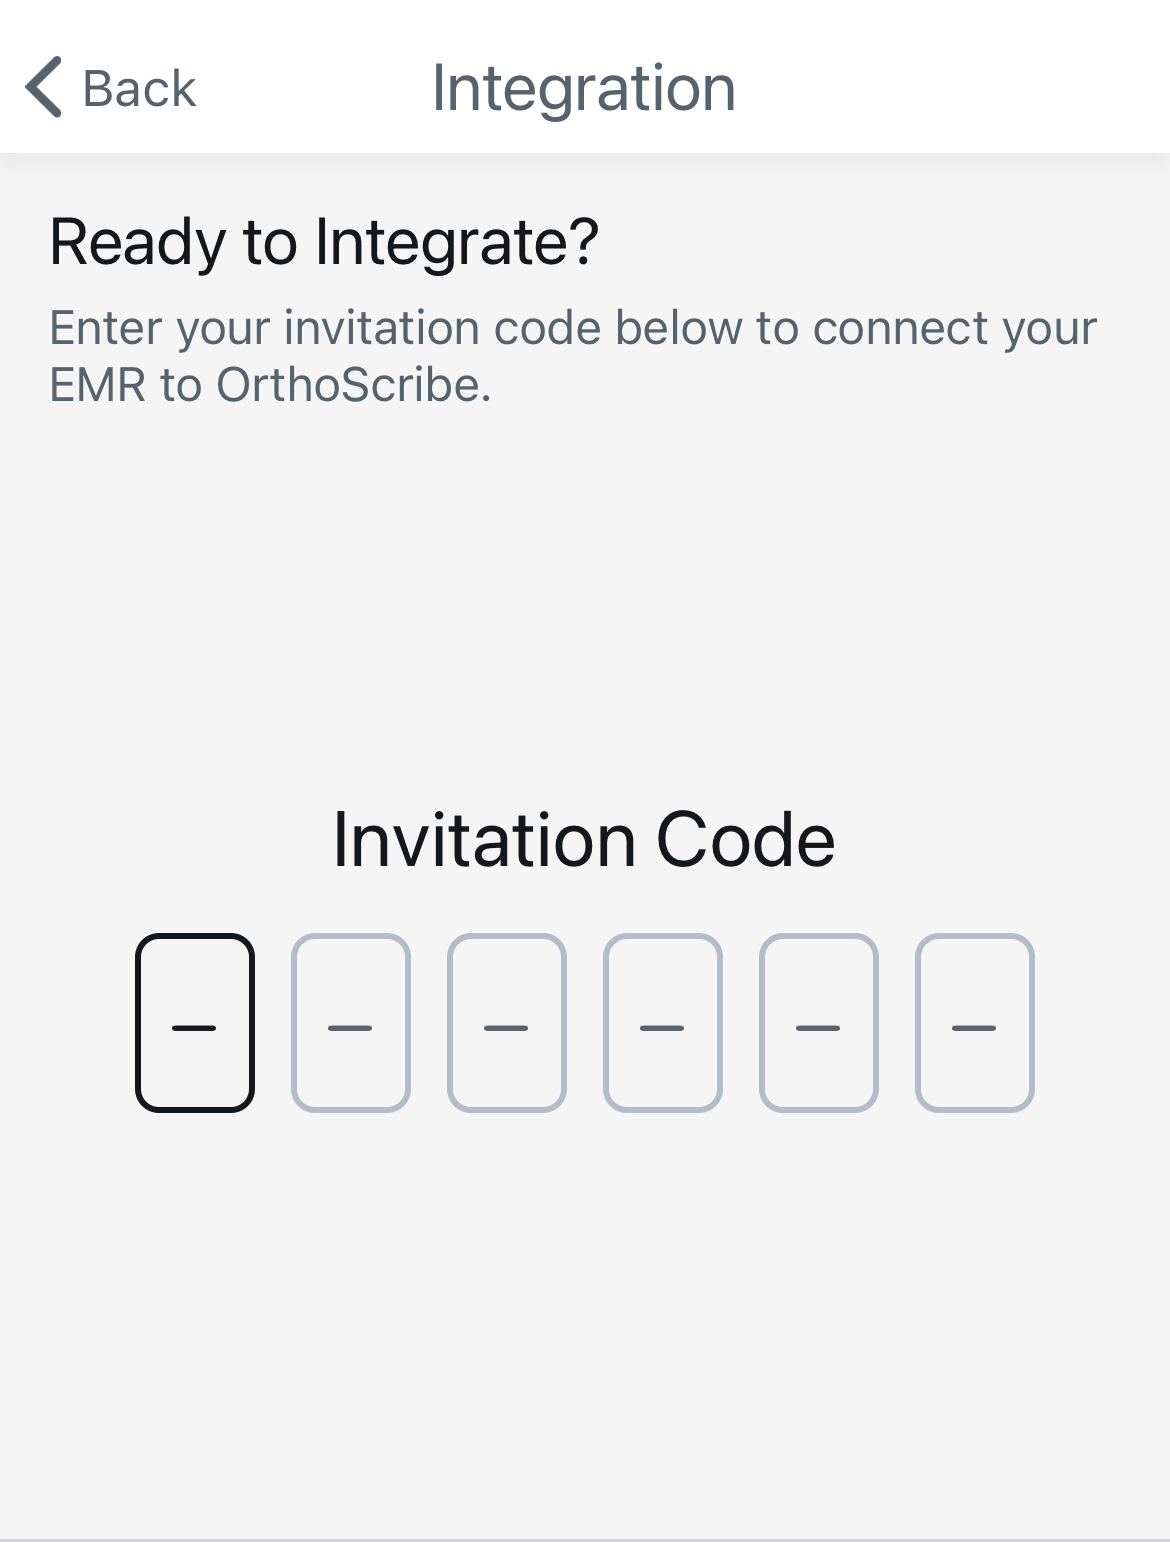
1. Enter Code
App Settings → Integration and paste the code to link accounts.
2. Schedule Import
Your EHR schedule appears automatically inside OrthoScribe.
3. Record the Encounter
- • Tap a patient → Start to capture ambient audio
- • Add direct dictation for specifics (imaging reads, plan details)
- • Use voice macros: say "insert [macro name]"
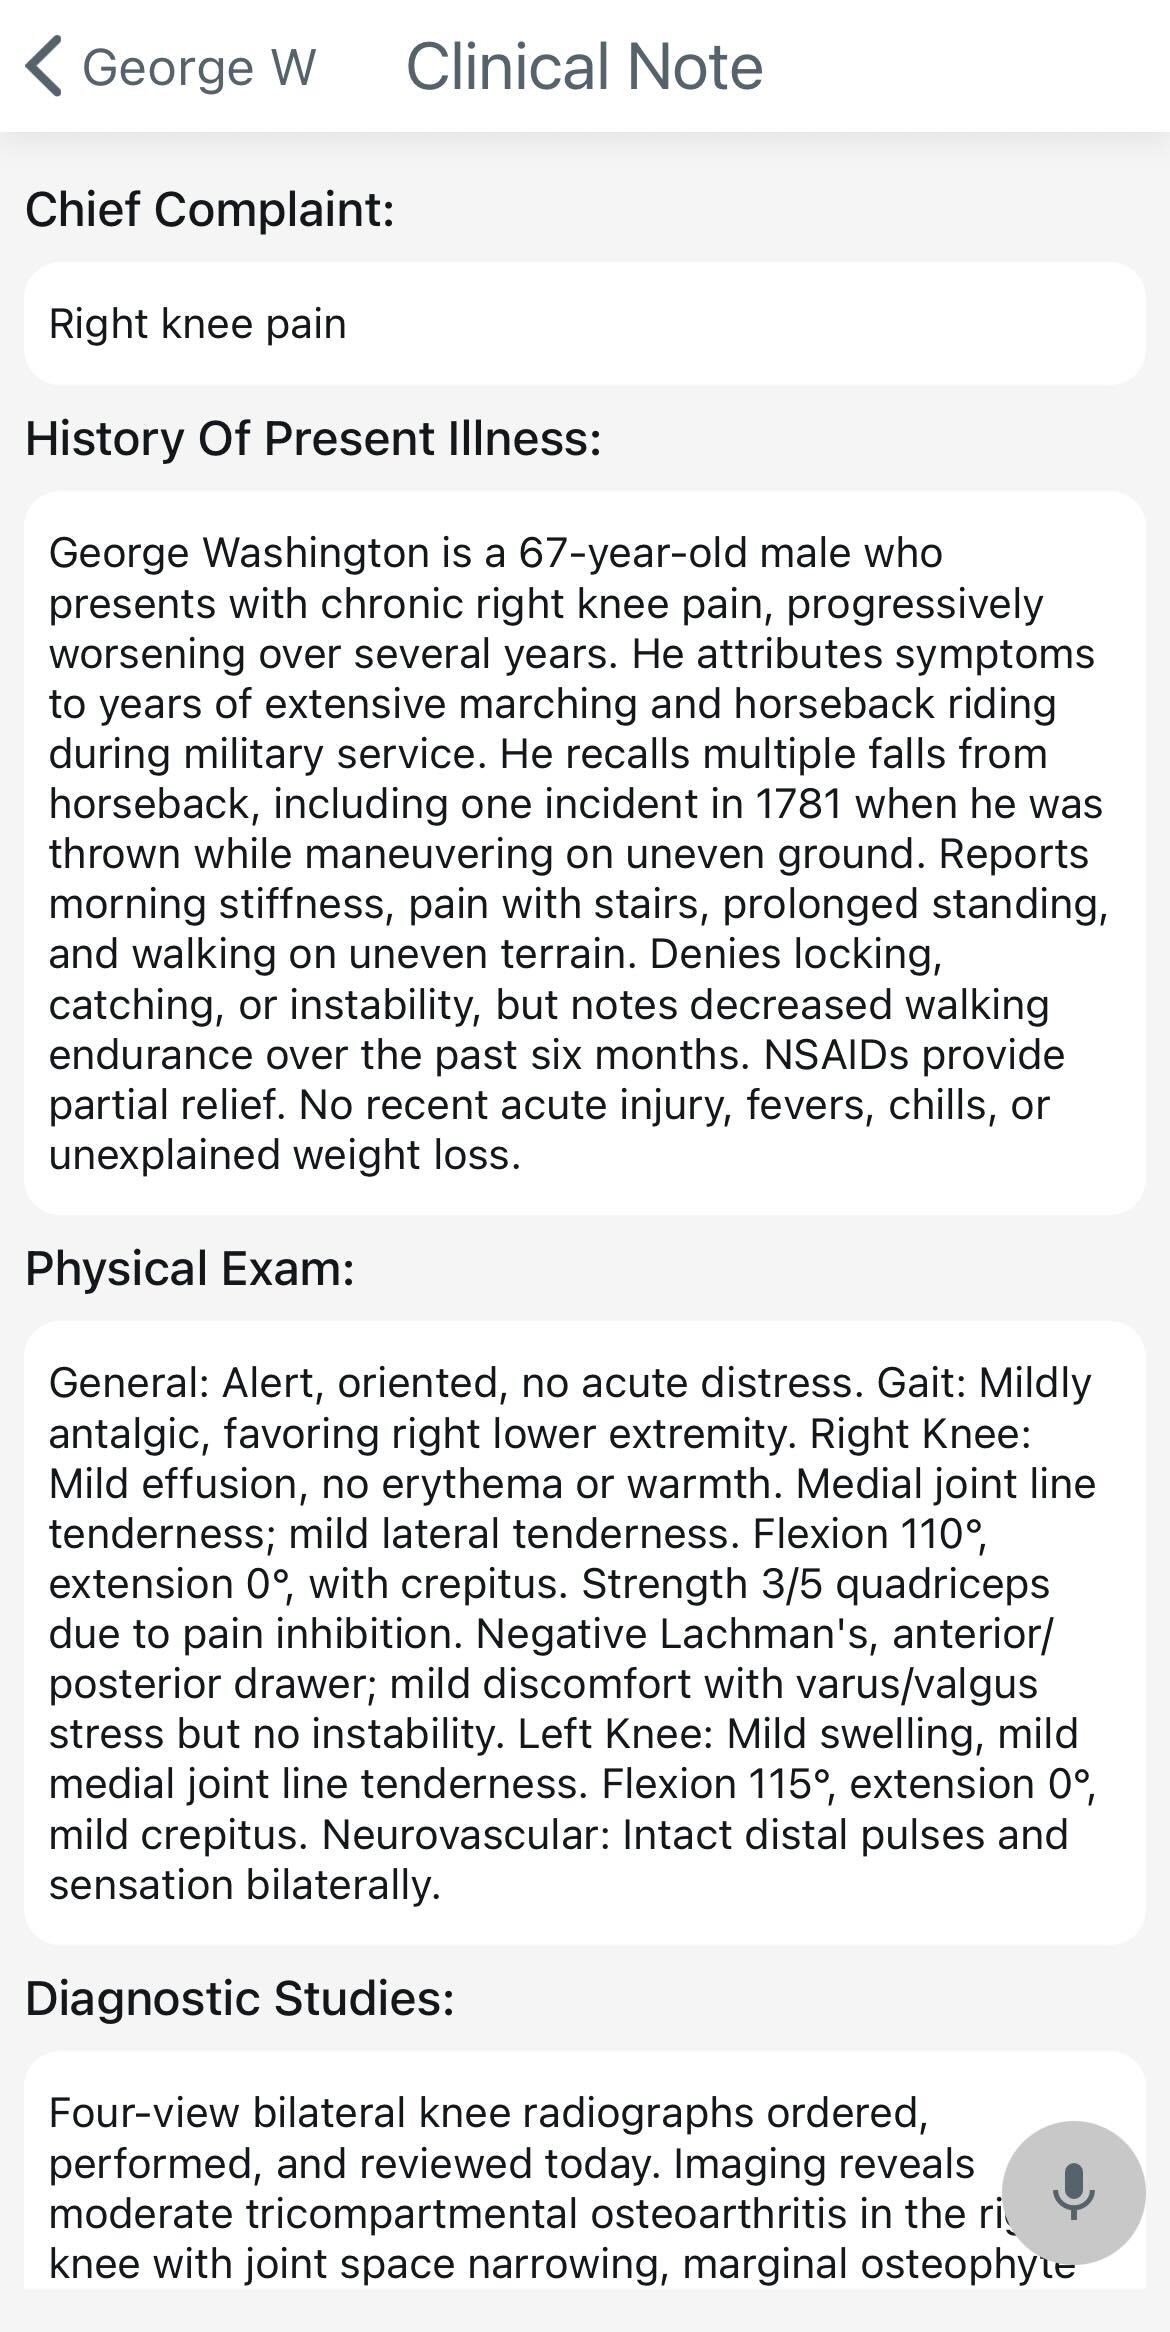
4. Review Note & Codes
- • Confirm sections (CC, HPI, PE, Diagnostic Studies, Impression/Assessment, Plan, Procedures)
- • If enabled, review Automatic Coding suggestions
5. Upload
Notes & codes auto-upload to the EHR. Complete final review/submit inside your EHR.
Daily Pattern (Integrated)
Open app (schedule auto-loaded) → Record → Review → Auto-upload → Submit in EHR
4. Non-Integrated (Standalone) Workflow
For users without an EHR connection.
4.1 Build Your Schedule
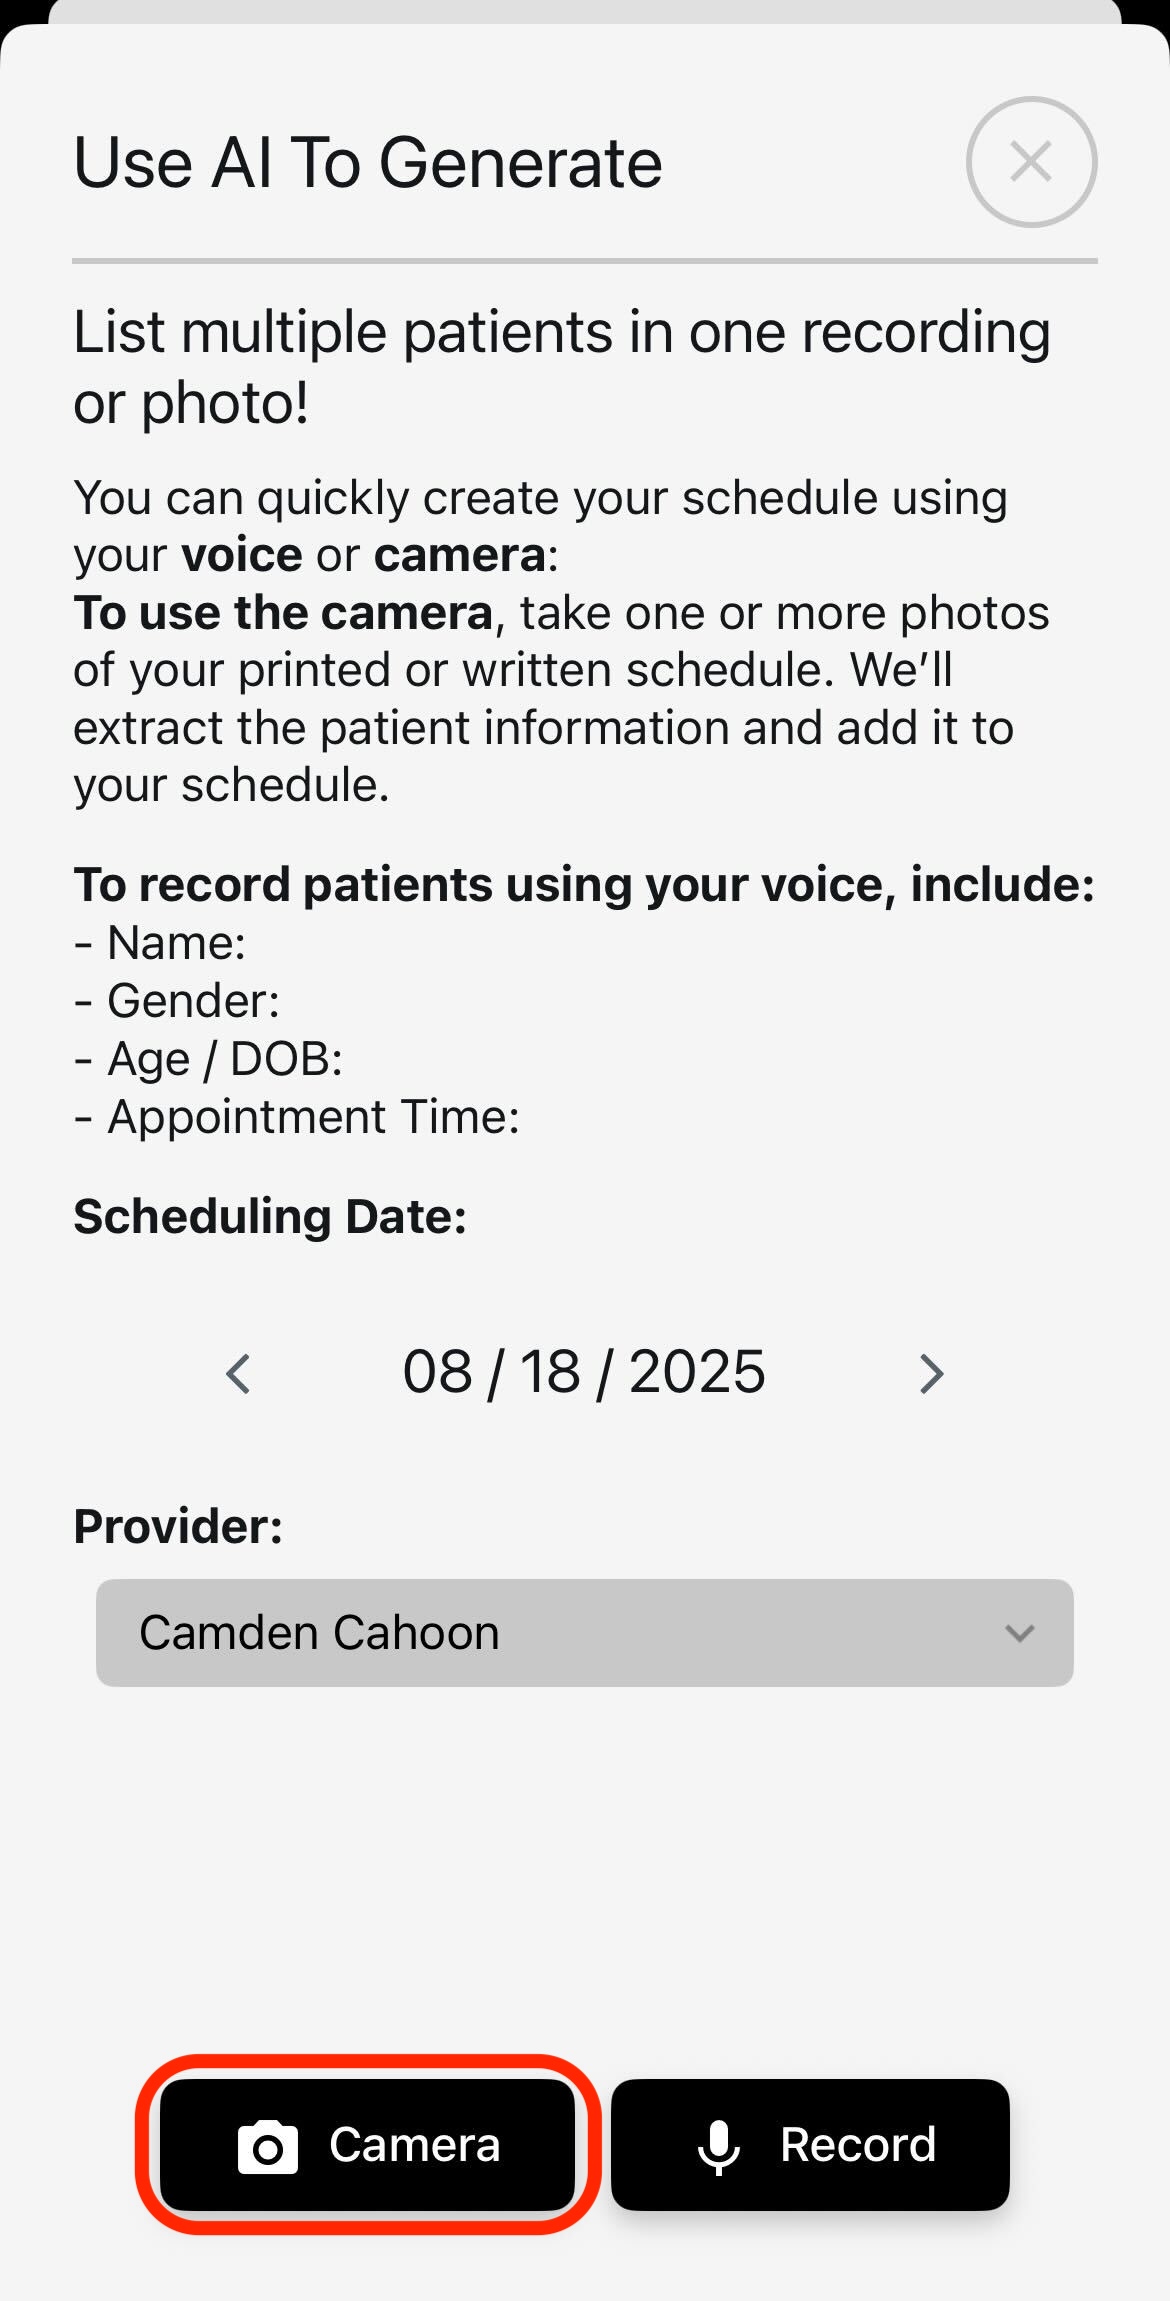
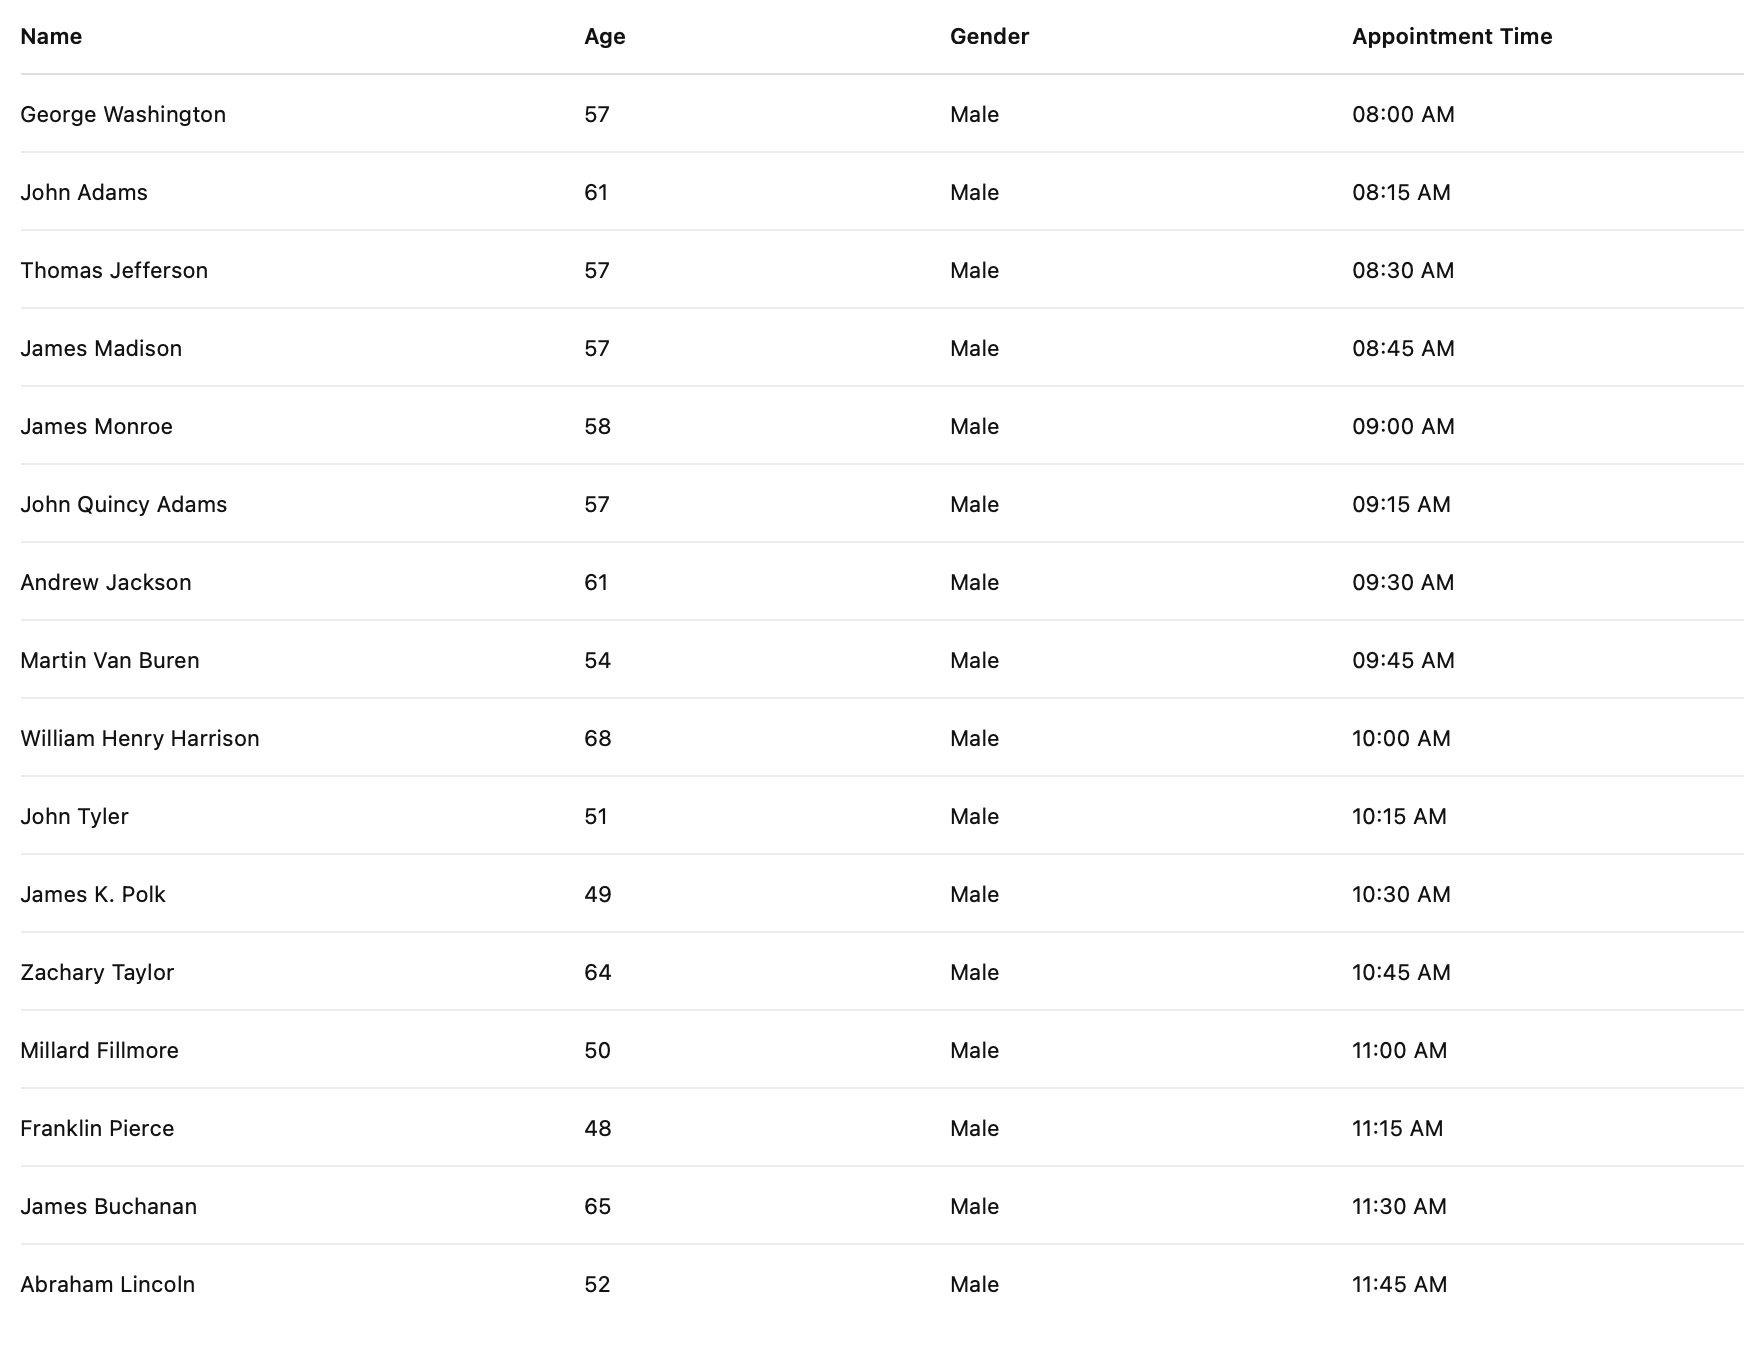
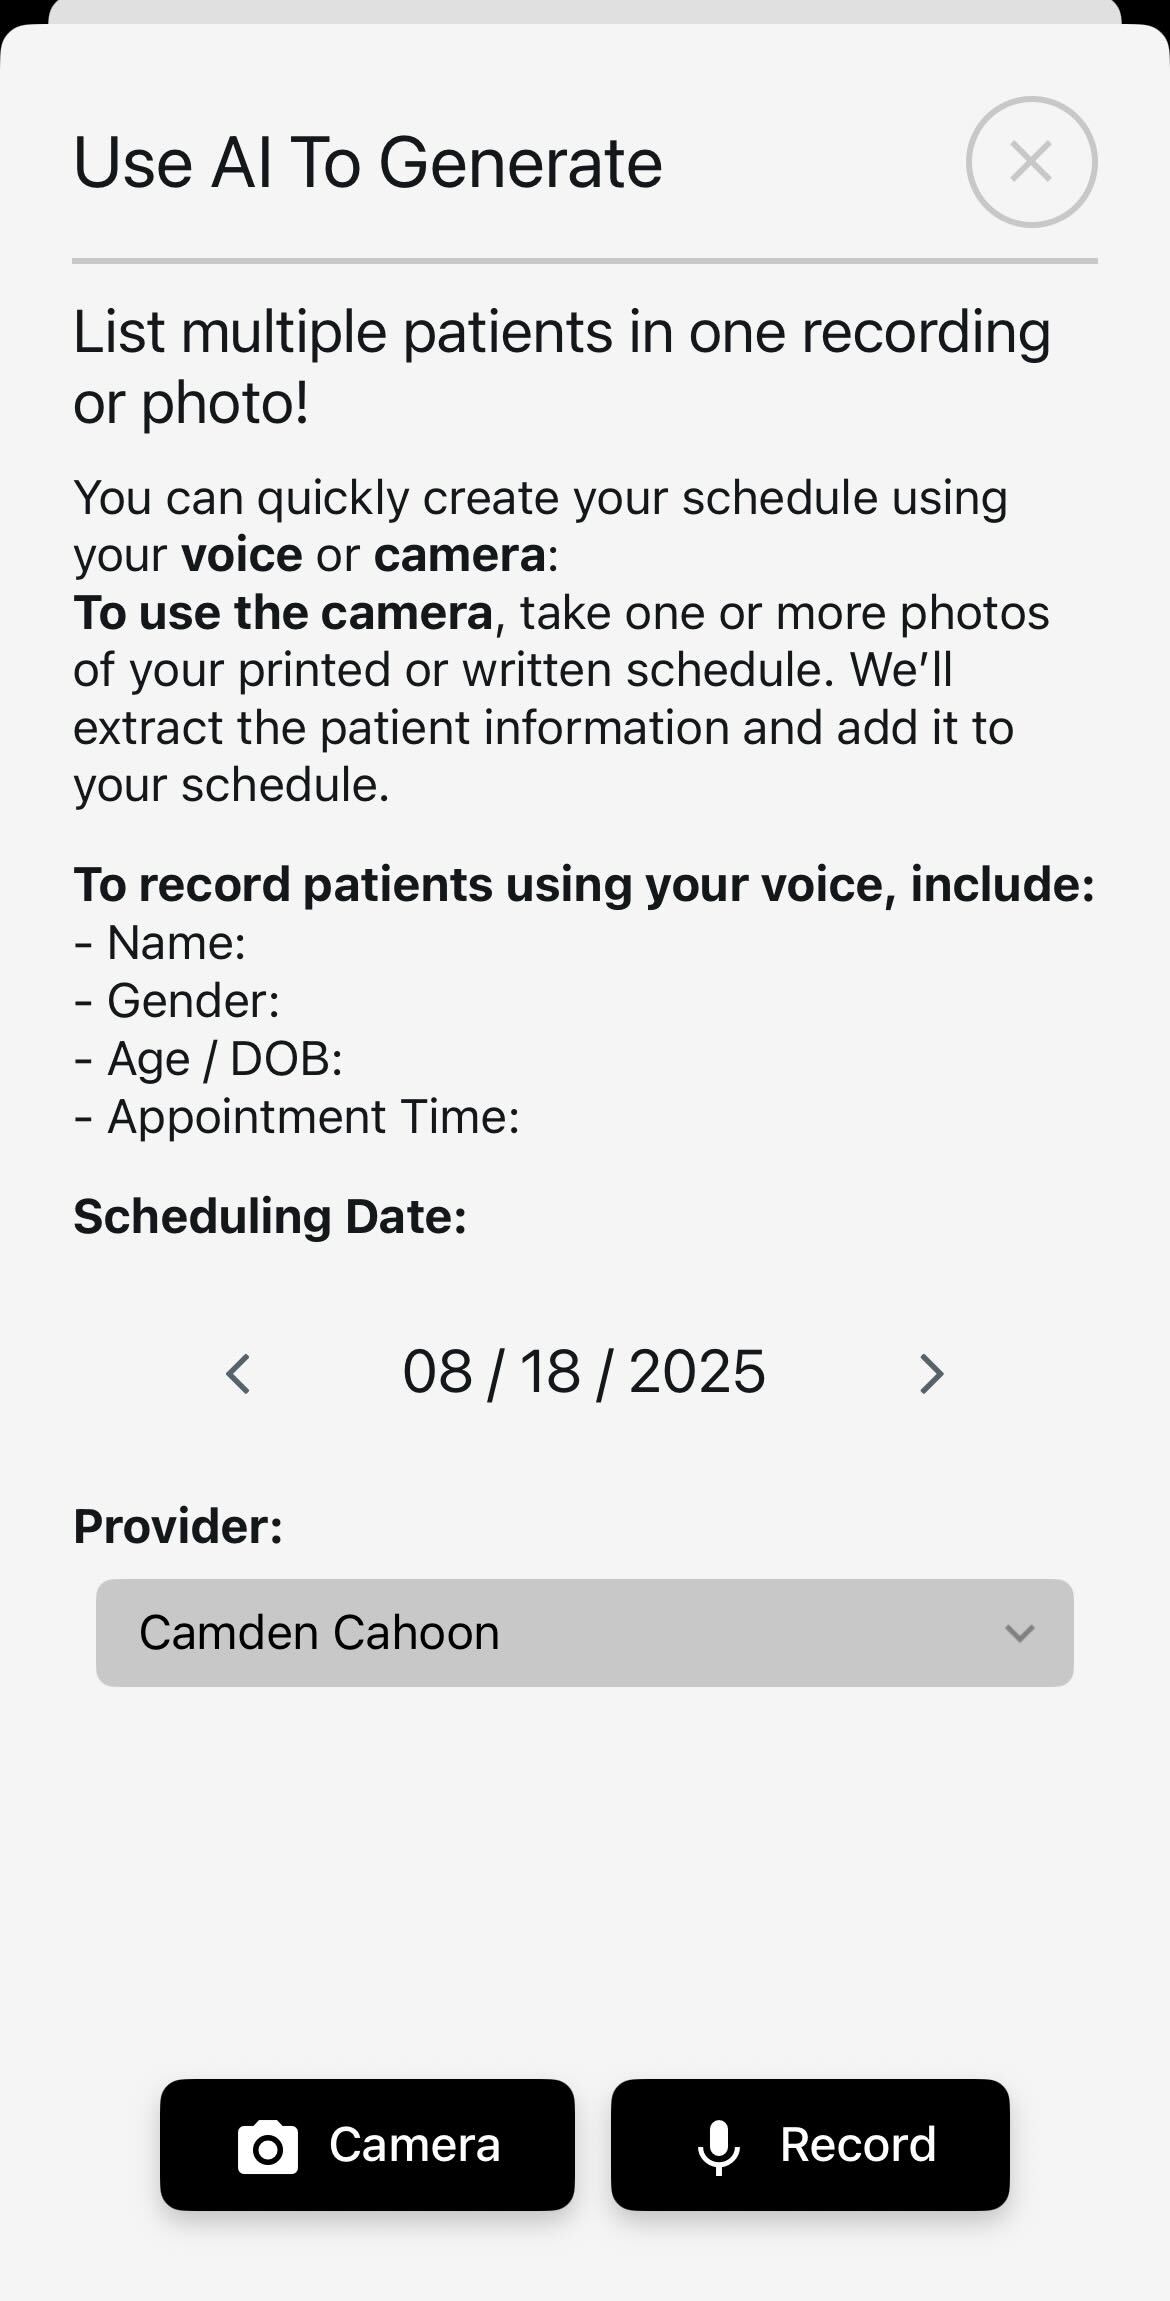
Camera (AI OCR)
Tap Add Patient, then Camera and take 1–3 photos of your printed schedule or screen. The app extracts Name, Gender, Age/DOB, Time and deduplicates.

Record (Bulk Voice)
Tap Record and read your list naturally (no pauses needed). When you stop, OrthoScribe creates encounters.
Pick Provider & Date
Verify correct Scheduling Date and Provider before capture.
4.2 Record the Visit
Ambient capture and/or direct dictation. Use macros with the "insert …" command when helpful.
4.3 Export to Your EHR
- • Go to app.orthoscribe.ai (web)
- • Open a patient and use action buttons: Copy note, Edit, Reprocess
- • Paste text into your EHR
- • Alternatively, use Wireless Mic on desktop to dictate the note directly into your EHR fields
Daily Pattern (Non-Integrated)
Create schedule (Camera/Record) → Record → Review → Copy from web (or dictate via Wireless Mic) into EHR
5. Schedule Sharing & Team Collaboration
Setup Path
Menu → Settings → Share Schedule
Share with Provider
Send invitation. Two lists appear:
- • Providers Sharing with Me — you can view their schedules
- • Providers I Am Sharing With — they can view your schedule
QR Code Linking
One user displays a QR; the other scans in-app to link instantly.
Typical Standalone Setup
Provider shares with MA/PA. The MA creates the schedule each morning, records intake audio, and copies notes from the web portal into the EHR.
6. Recording Encounters (AI Note Service)
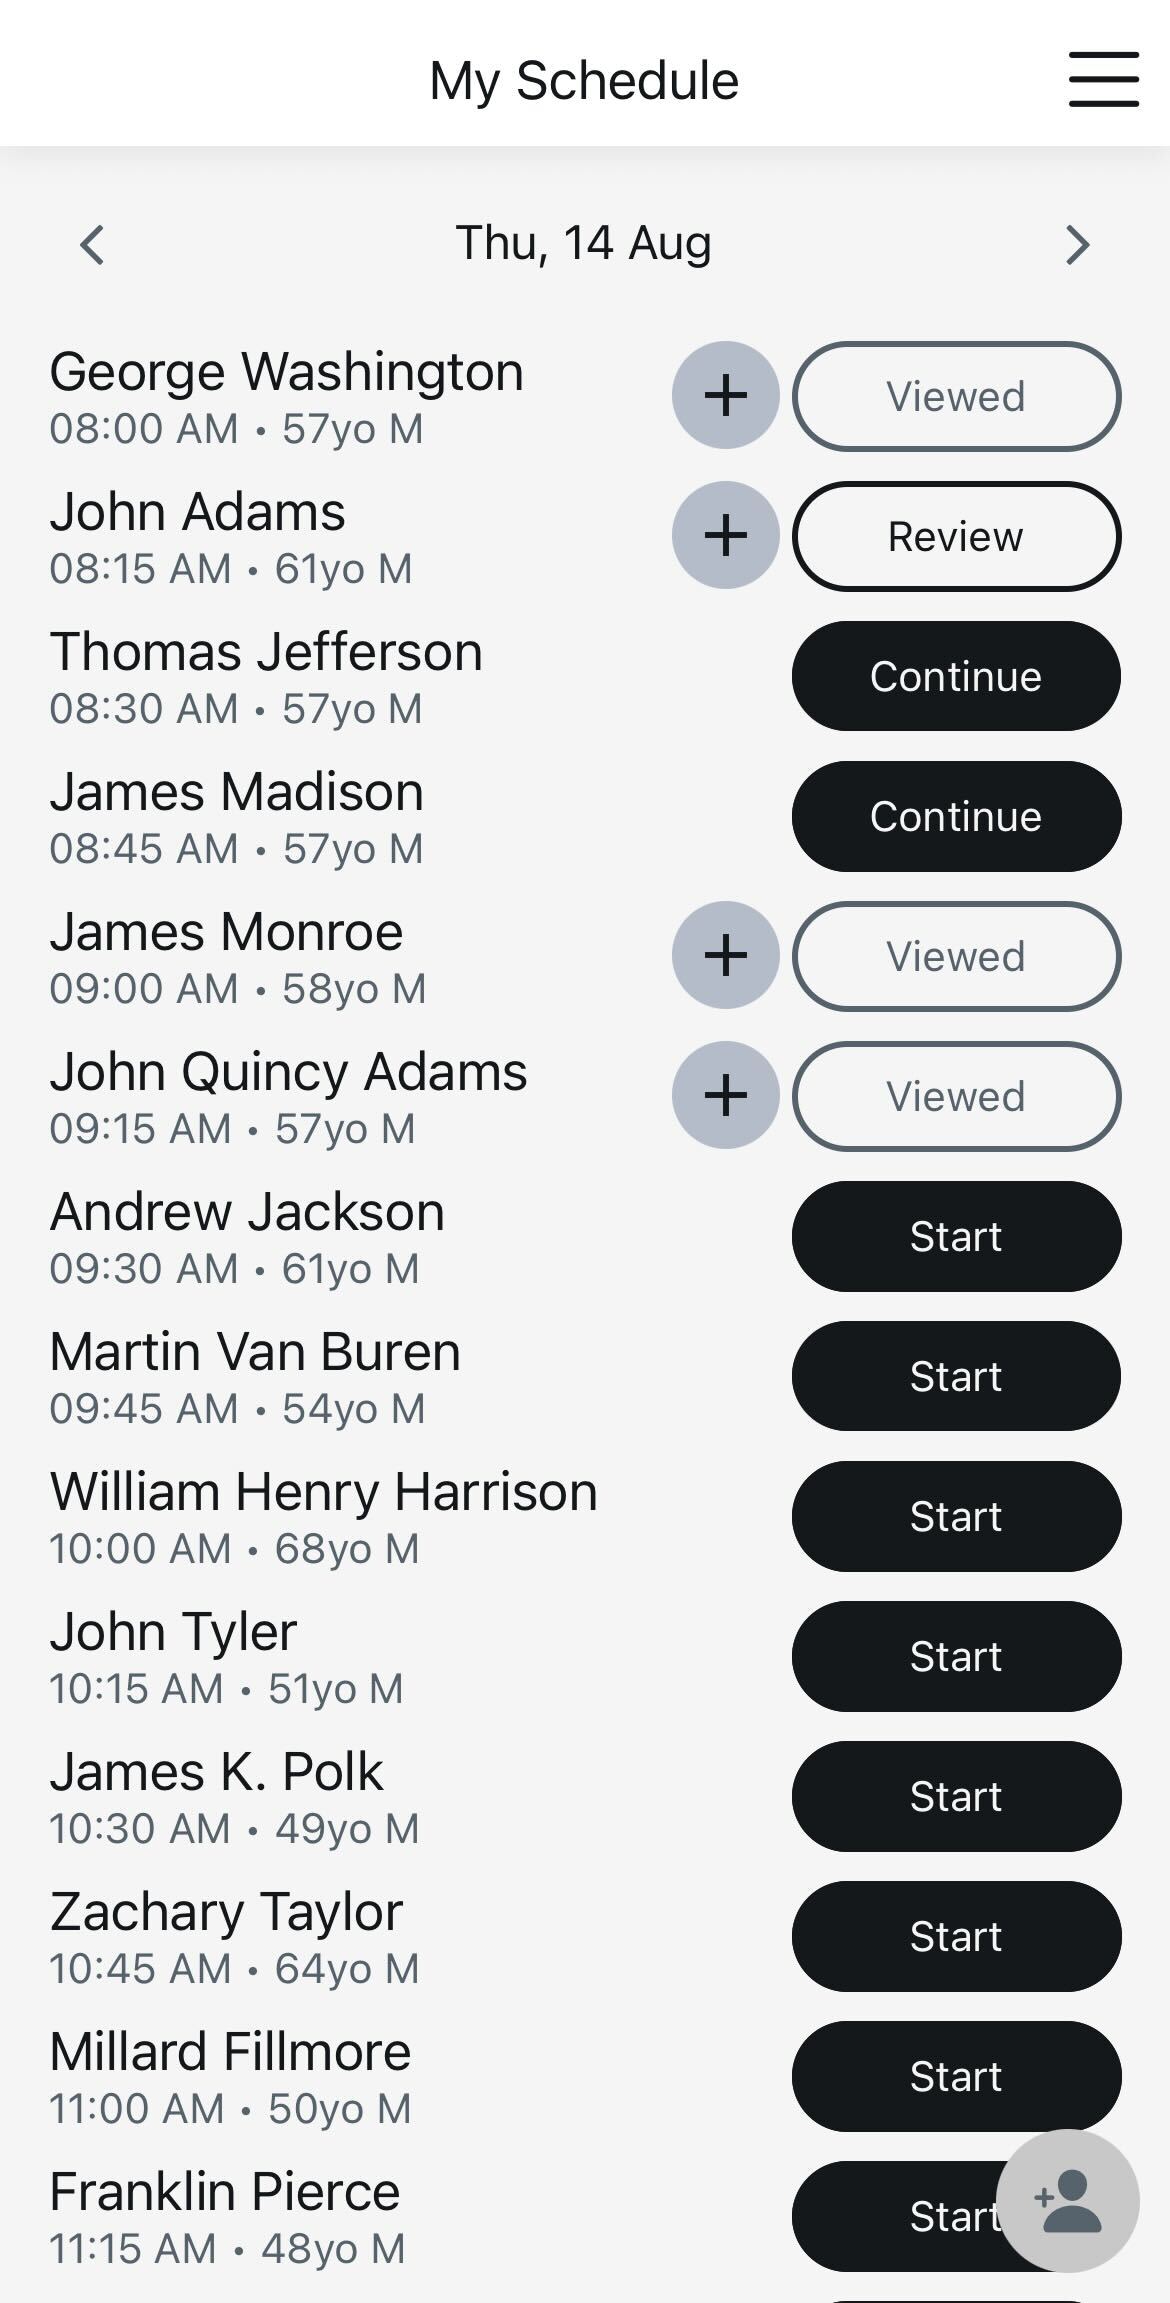
Getting Started
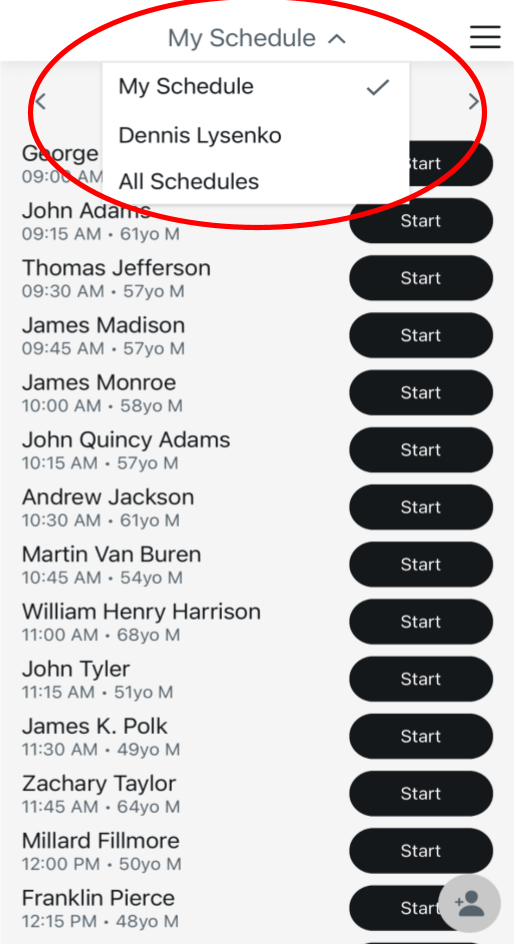
Open a patient from My Schedule → tap Start.
Recording Modes
Ambient Mode
Keep the phone nearby and speak naturally; casual conversation is okay.
Direct Dictation
Speak section-targeted details (e.g., MRI findings) exactly as you wish them transcribed.
Voice Commands
- • “Insert [macro name]”
- • “Add to Plan…”
- • “In Diagnostic Studies…” / “In Physical Exam…”
Note: Note generation can be customized based on your preferences (e.g., automatically number your plan, bullet your physical exam findings). Contact support for advanced configuration.
Finishing Up
- • Tap End Session to generate the structured note
- • Use Add later to append audio and Reprocess
- • Important: Always state side (e.g., "right knee"). Gestures aren't recognized.
7. Wireless Mic (Speech-to-Text + Macros)
How It Works
- Install Desktop app and open a text field in your EMR (or any app)
- Use the mic on your phone: speak and watch text appear at the cursor in real time
- Macros via STT: "Insert [macro name]" to expand phrases/templates
- Ideal for: dictating complete notes from scratch, letters, forms, or quick edits anywhere
Frequently Used Settings
- • Speech to Text → Word Swap (custom substitutions)
- • EMR Settings → Uploads / Disclaimer
- • Automatic Coding (toggle on/off)
8. Macros
Creating & Managing
Create/Manage in web portal → Macros tab.
Example: Insert {side} knee exam
Sample Templates:
Macro: Normal Shoulder Exam
Procedure: Subacromial Injection
9. Procedures & Automatic Coding
Procedures
- • Templates in web portal → Procedures
- • Automatically recognized; no special voice prompt needed
- • Fill specifics via variables (e.g., side, size, approach) as needed
Automatic Coding (CPT & ICD)
- • Enable in Settings → Automatic Coding
- • Review suggested codes alongside your note
- • Confirm accuracy before submission (Integrated) or before copy/paste (Standalone)
10. Reviewing, Editing & Exporting Notes
On Mobile
Review structured sections and make quick edits.
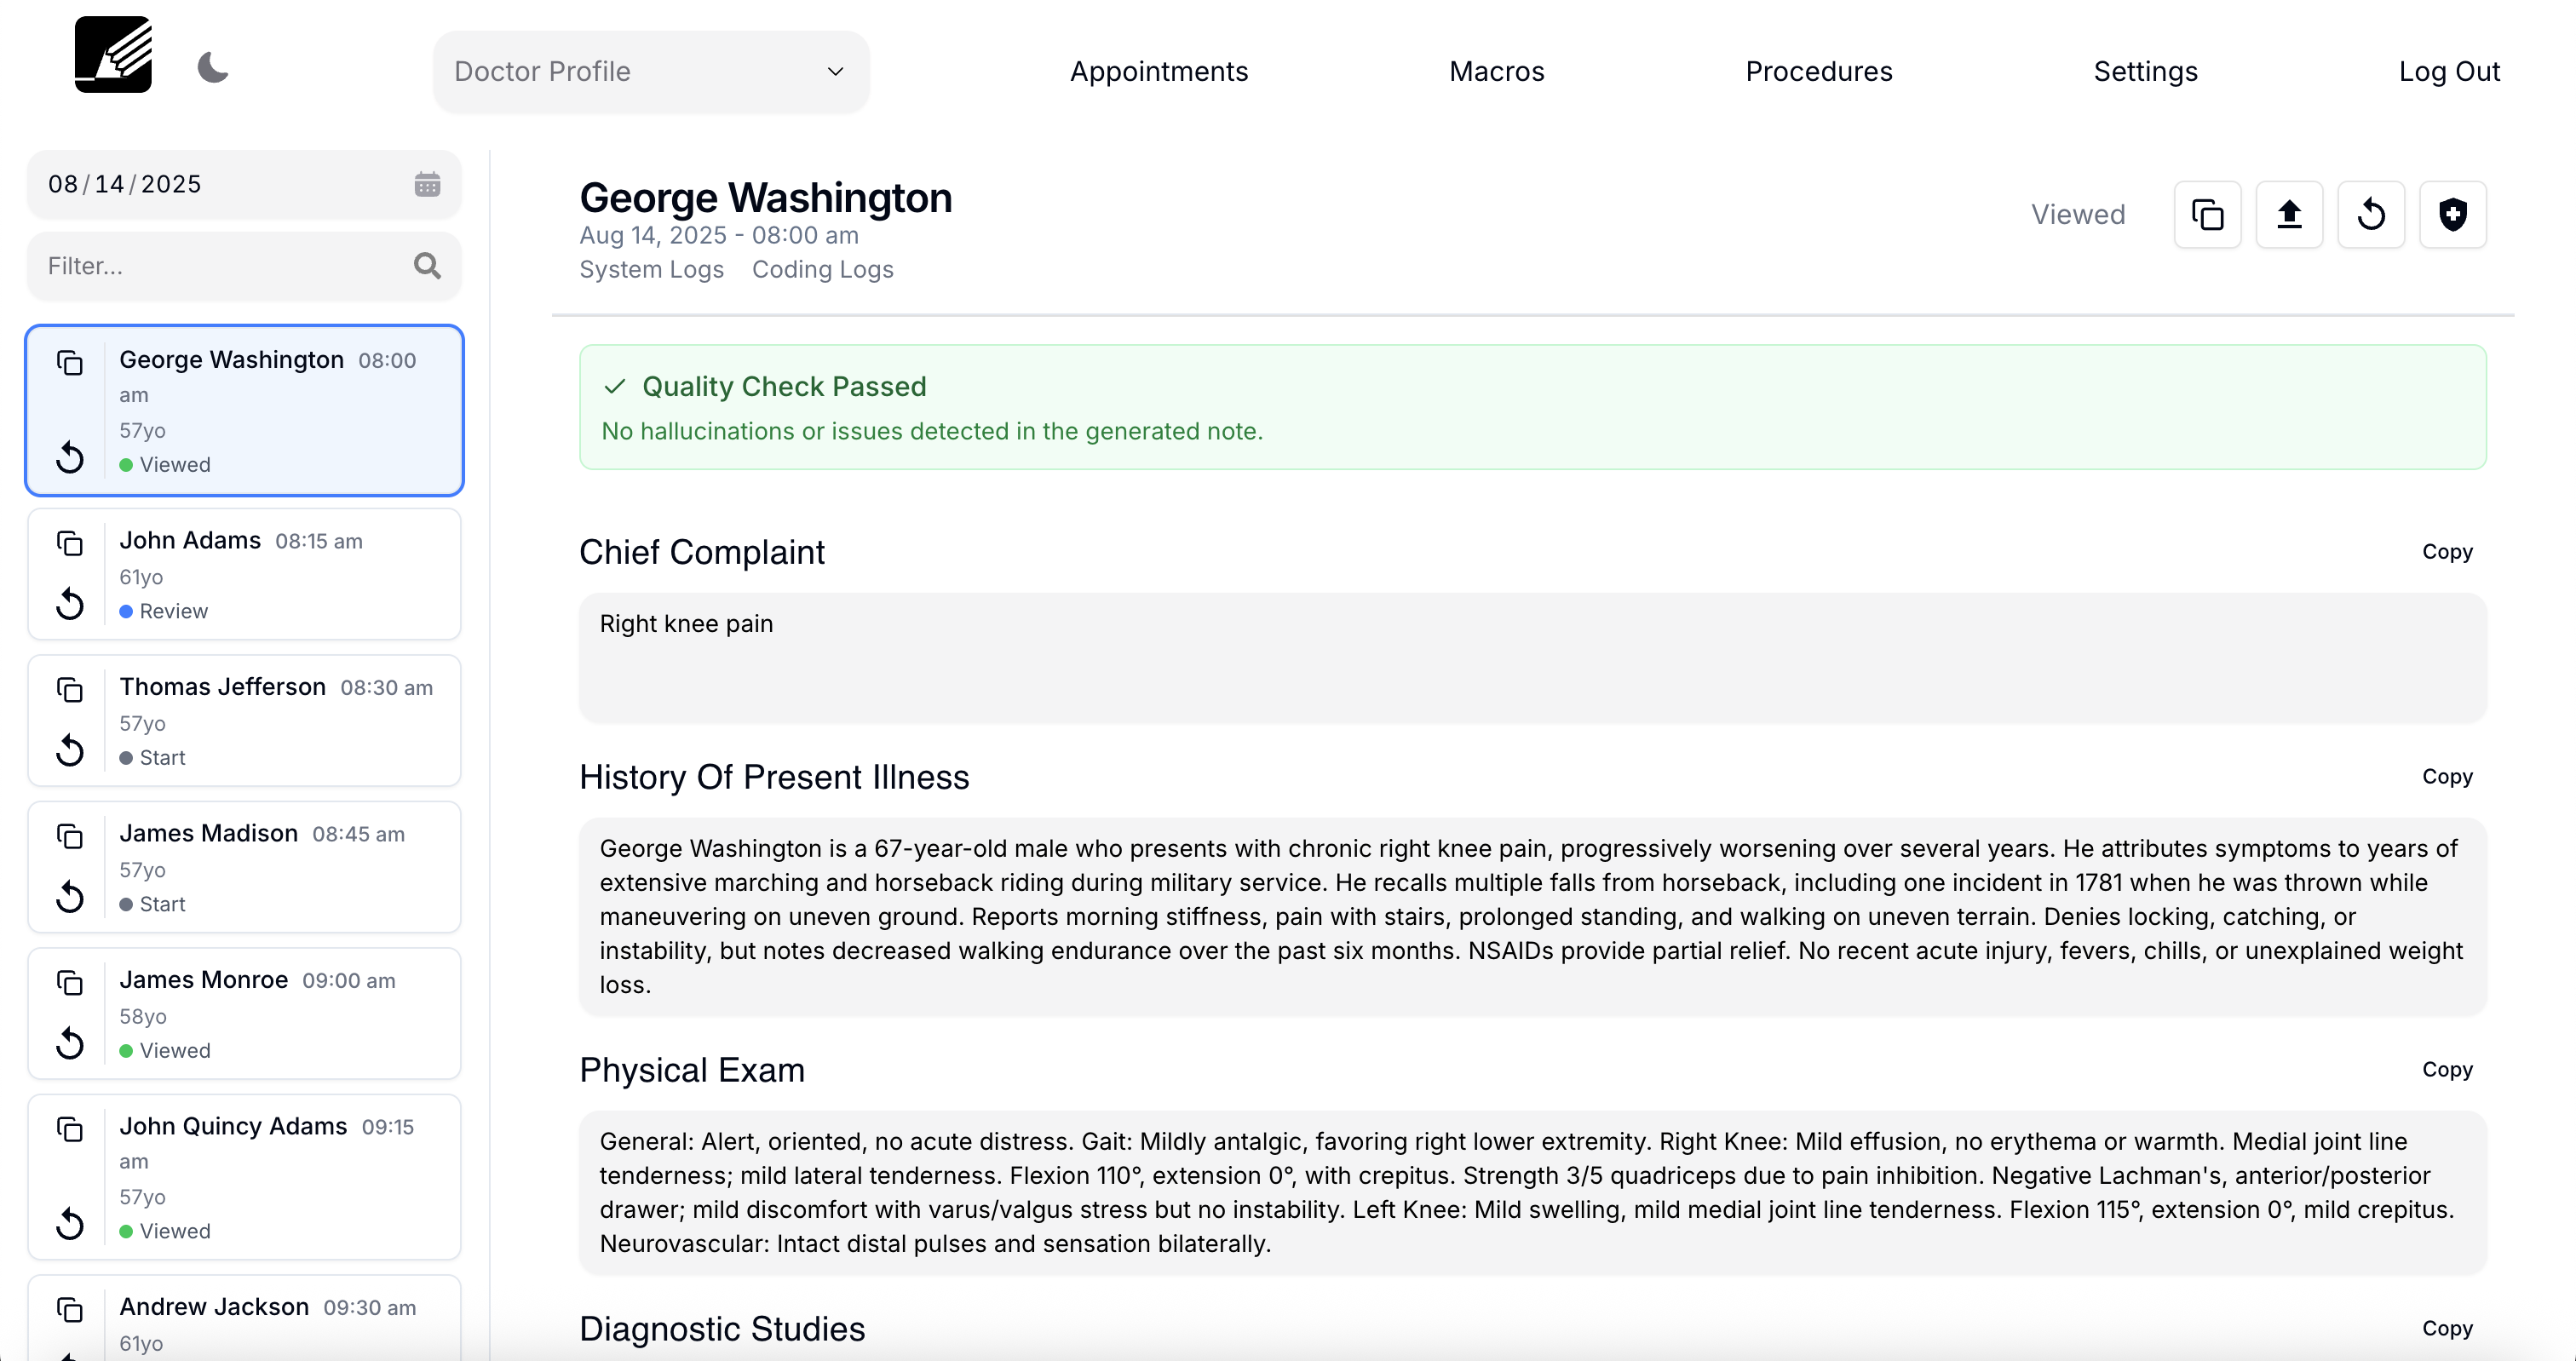
On Web (app.orthoscribe.ai)
Left panel = encounters list; main panel = note sections.
Actions: Copy entire note (double-box), Edit, Upload/Export (integrated), Reprocess.
Export Paths
- • Integrated: Auto-upload to EHR; finalize in EHR
- • Standalone: Copy from web to EHR (fastest) or dictate with Wireless Mic into EHR fields
11. Freeform Notes (Op Notes, Letters, etc.)
From a patient, choose Freeform Note. Dictate continuously; we correct punctuation/spacing.
Export: Integrated (upload) or Standalone (copy from web / dictate via STT).
12. Apple Watch
Open iPhone app daily (to sync today's list) → use Watch app to start/pause/end recordings with minimal distraction.
13. Roles & Responsibilities
Provider
Review schedule, record, approve note/codes, export/submit.
MA/PA/NP
Build schedules (Camera/Record), record intake, copy notes from web to EHR, manage macros/procedures.
Admin
Provision integration codes, enable coding, set org‑level preferences.
14. Best Practices & Voice Tips
Essential Tips
- • Always state laterality and critical findings clearly
- • Use macros for repeats (normal exams, imaging reads, common plans)
- • For dense terminology, slow slightly for best STT accuracy
- • Ambient capture: keep the phone within comfortable speaking distance
Handy Snippets
15. Training & Rollout (Clinic Playbook)
Week 1
- • Pick workflow (Integrated vs Standalone)
- • Install apps; create 5–10 macros; run 1 clinic half‑day using ambient + direct dictation
Week 2
- • Expand macros; enable coding; MA builds schedule daily; provider verifies and exports
MA Checklist (Daily)
- • Verify provider/date; Camera or Record to build schedule
- • Start intake recording; tap Back when done
- • After visit, copy note sections from web into EHR
16. Troubleshooting & FAQs
Nothing on my schedule
- • Integrated: check code & provider filter
- • Standalone: use Add Patient
Wireless Mic not typing
Ensure desktop app is open and a text field is focused. Re‑pair if needed.
Macro didn't trigger
Start with the word "insert" and the macro name.
Ambient picked up chit-chat
Only clinically relevant content is extracted; review and edit as needed.
Laterality missing
Always speak side; gestures aren't recognized.
17. Security & Privacy
- • HIPAA‑aligned workflows. Provider‑managed access via Schedule Sharing (revoke anytime)
- • Exports & disclaimers configurable under EMR Settings
- • Contact support for org‑level retention/configuration options
18. Contacts & Support
Clinical onboarding
Sravan Dhulipala — sravan@lotusscientific.com | +1 (404) 771‑8746
Technical support
Recording Encounters (AI Note Service): Note generation can be customized based on your preferences (e.g., automatically number your plan, bullet your physical exam findings). Contact support for advanced configuration.